

Agency mode is available to selected organizations. Ask your Slate contact to turn it on for your organization.
Why it matters
Setup tells Slate which workspaces are clients, which one is HQ, and who is agency staff. Health, call routing, alerts, and access all depend on these answers.Before you start
- You need the Owner role in the organization. Admins see the Agency mode card, but only the Owner can turn it on.
- Your organization needs a paid plan and a working card in Billing. Agency mode isn’t available during a trial or on annual plans yet.
- Know your agency’s email domains, for example
youragency.com.
Start the wizard
- Click the Settings icon (sliders) on the sidebar rail and choose Organization settings.
- On General, find the Agency mode card.
- Click Turn on. If you started before, the button reads Continue setup.
Step 1: Pick your HQ workspace
HQ is your agency’s internal workspace. It holds agency reports and pays for agency drafts. Client users can never join HQ, and HQ is never billed as a client.- Choose one option:
- Create “‹Organization› HQ” to make a new internal workspace. You can edit the name.
- Use an existing workspace, then pick an internal workspace you already use. A workspace that has client users can’t be HQ.
- Click Continue.
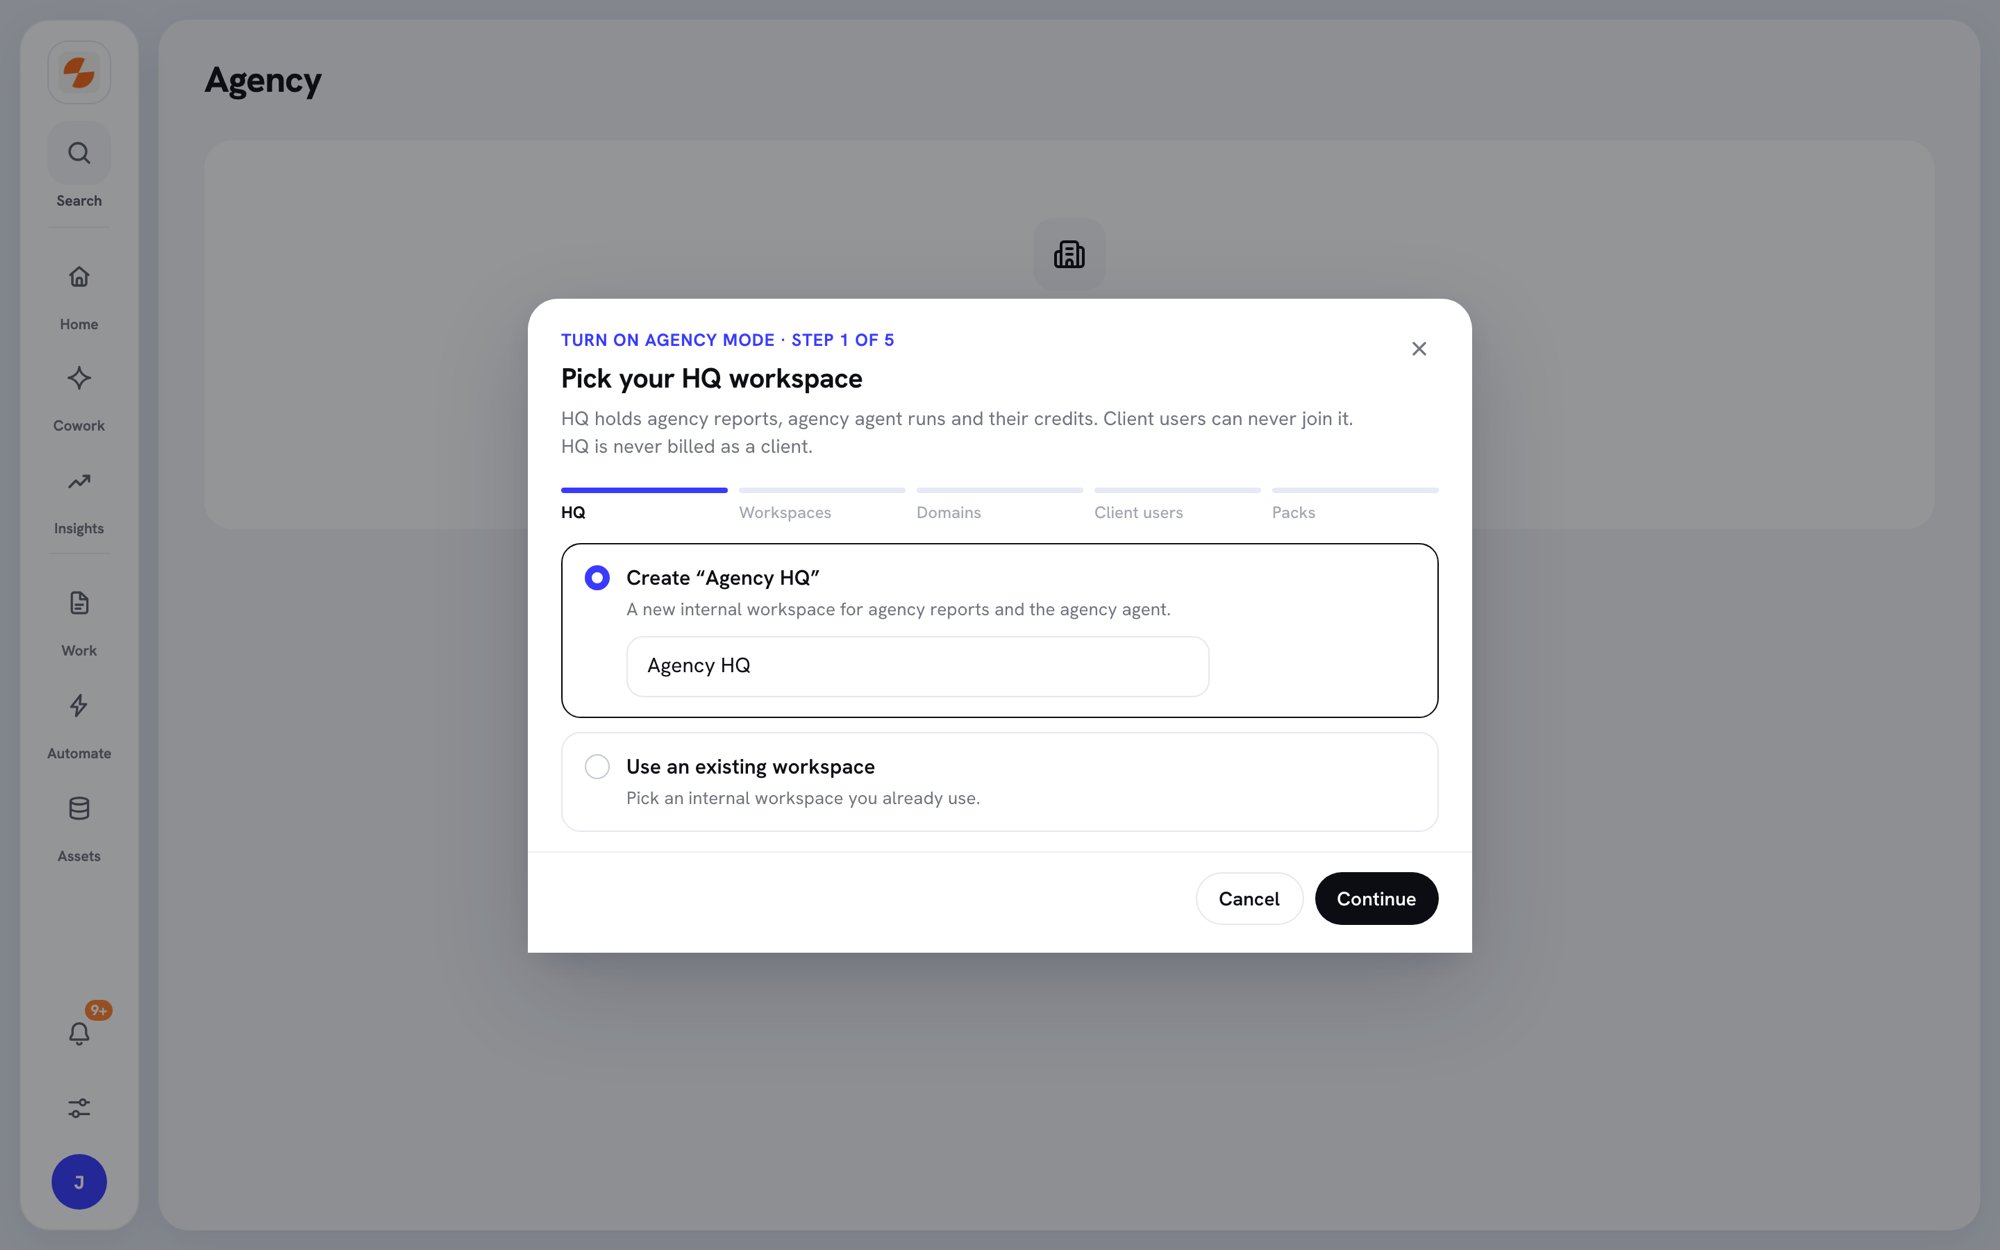
Step 1: Pick your HQ workspace
Step 2: Mark your workspaces
Every workspace except HQ starts as an Active client.- For each workspace, choose Active client, Inactive, or Not a client. Change test and internal workspaces to Not a client, and old clients to Inactive.
- To change many at once, select the workspaces, then use Set to in the bar that appears.
- Check the totals at the bottom, then click Continue.
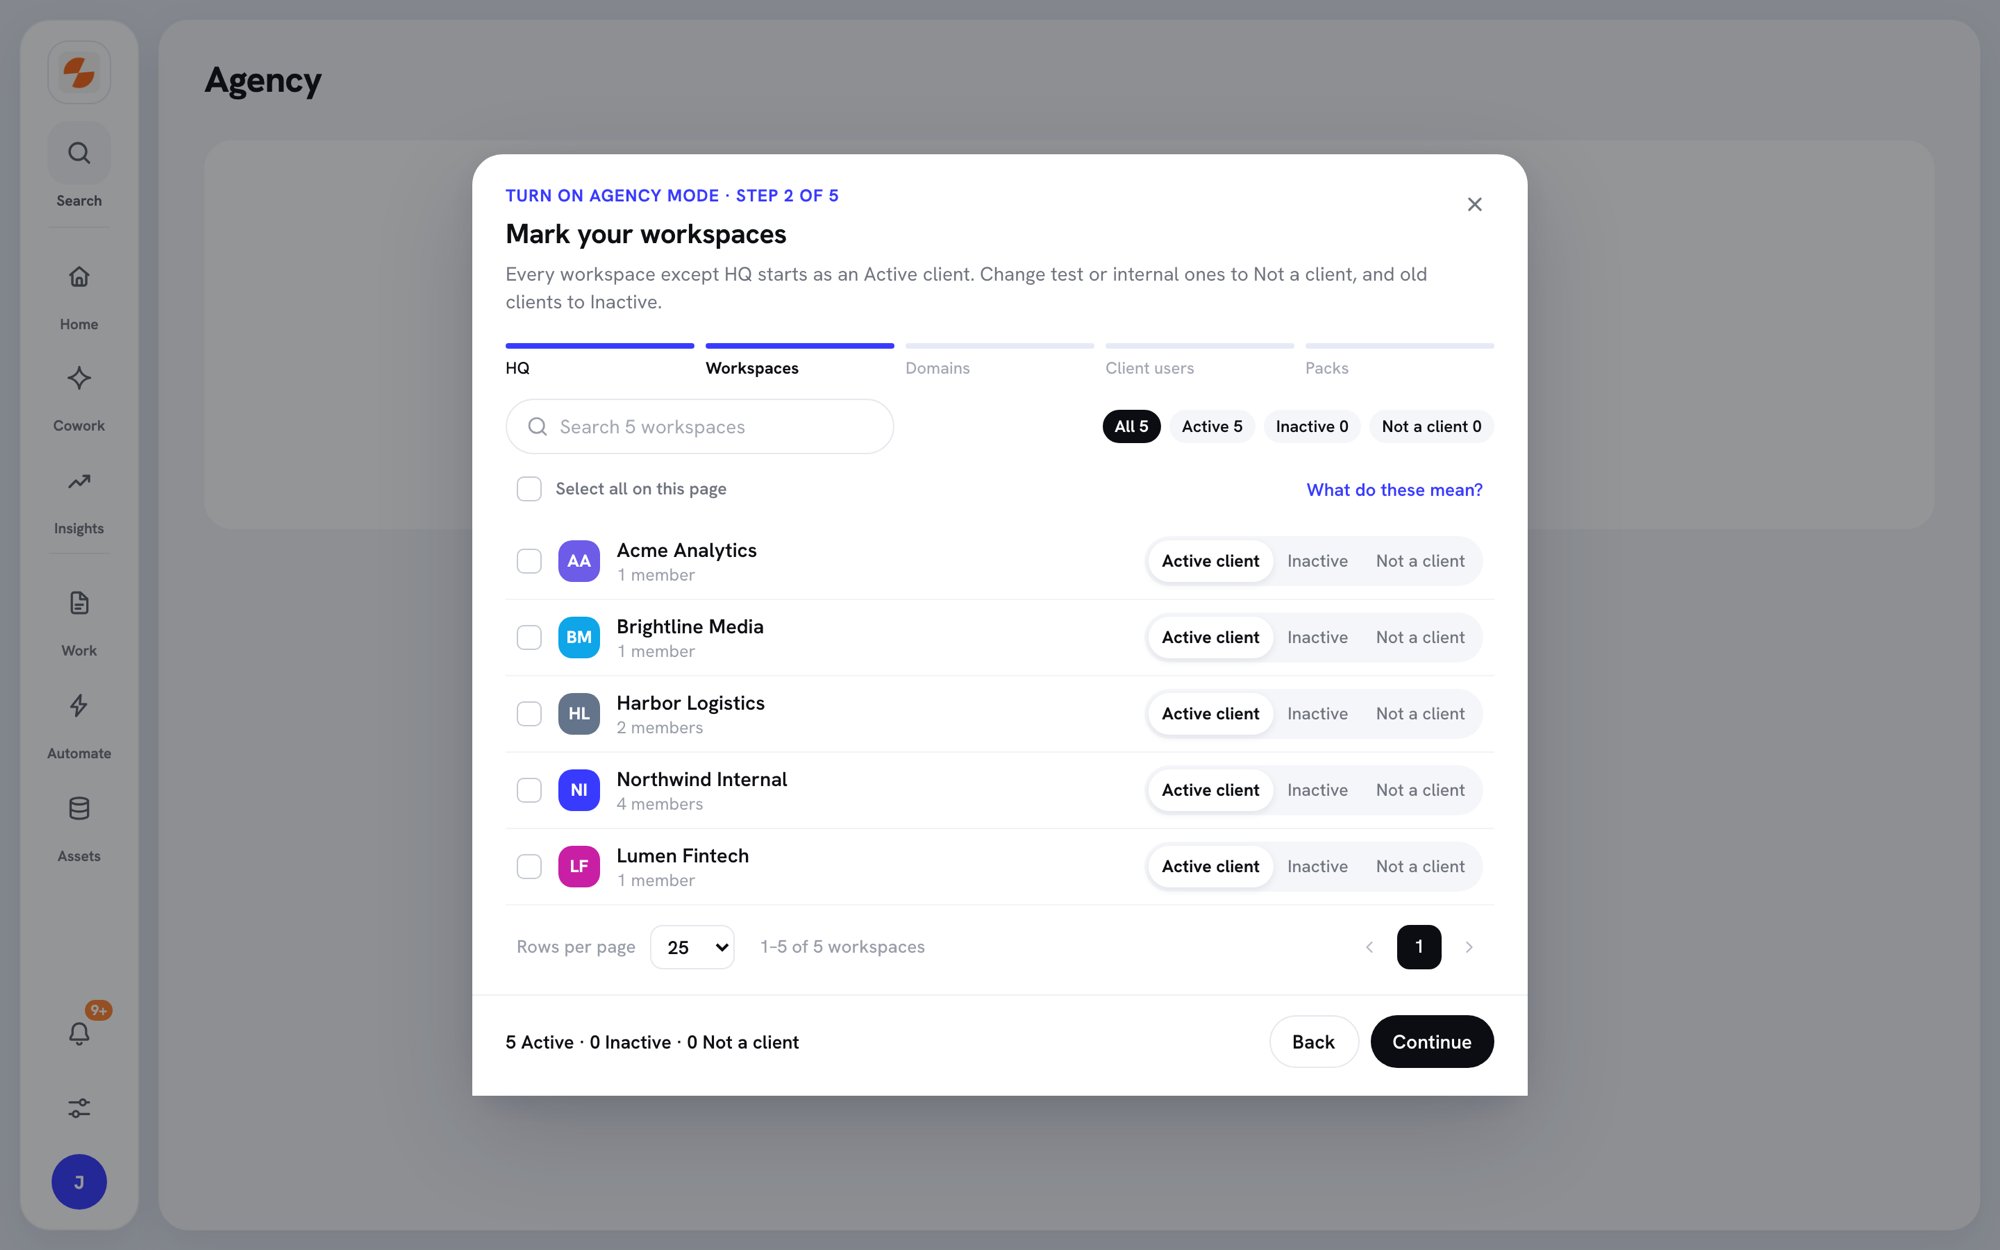
Step 2: Mark your workspaces
Step 3: Add agency email domains
People with these email domains are your team. Slate uses the domains to spot client users and to skip internal calls.- Check the domains under Agency domains. Slate prefills your own email domain, unless it’s a public one like gmail.com.
- Add any other domains your staff use.
- Click Continue.
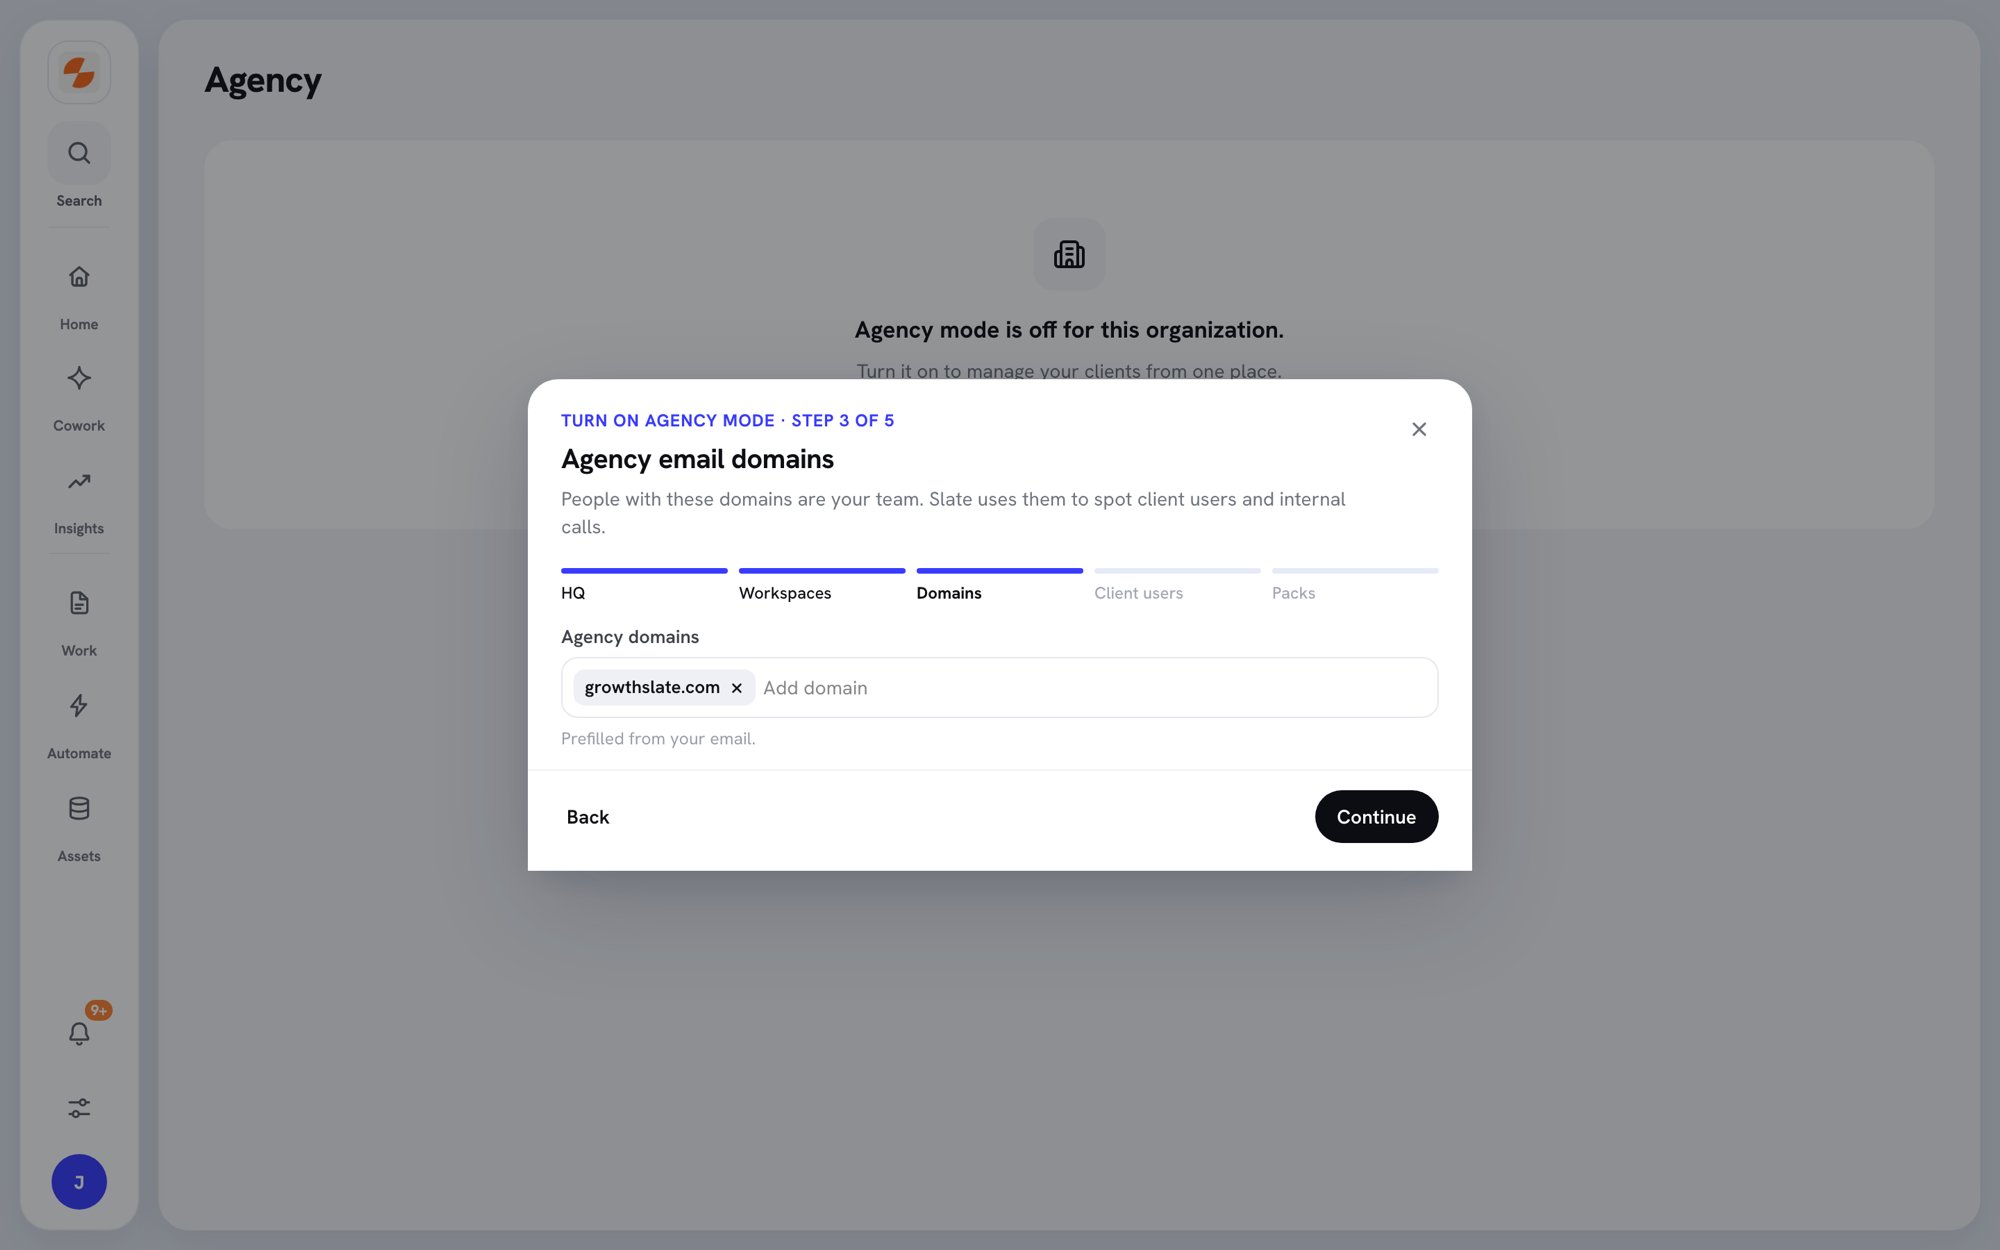
Step 3: Agency email domains
Step 4: Mark client users
Slate lists members whose email domain matches a client, grouped by client. Client users see only the workspaces they’re invited to.- Select the people who work for a client.
- Click Set ‹number› as Client, or click Skip to do this later.
Step 5: Buy client workspaces
Each pack adds 25 client workspaces and no credits. Your plan and its credits stay the same.- Set the number of packs. Slate shows the minimum you need for your Active clients. To go lower, go back and mark more workspaces Inactive or Not a client.
- Check the amount due today. It’s prorated to your next renewal date.
- Check the card. Click Change to use another card.
- Click Pay ‹amount› and turn on.
When setup is done
Slate shows Agency mode is on and how many client workspaces you’ve used. It suggests three things to do next:- Assign account managers. Alerts go to admins until each client has an account manager. See Manage clients.
- Connect your call recorder so each client call reaches the right client. Do this in Agency → Calls. See Client calls.
- Invite client users as Client, so they only see their own workspace. See Client users and permissions.
Change your setup later
The Agency mode card on Organization settings → General now shows On, with three tiles: Client workspaces, HQ workspace, and Agency email domains. Below them are links to Agency settings, Billing, and Turn off.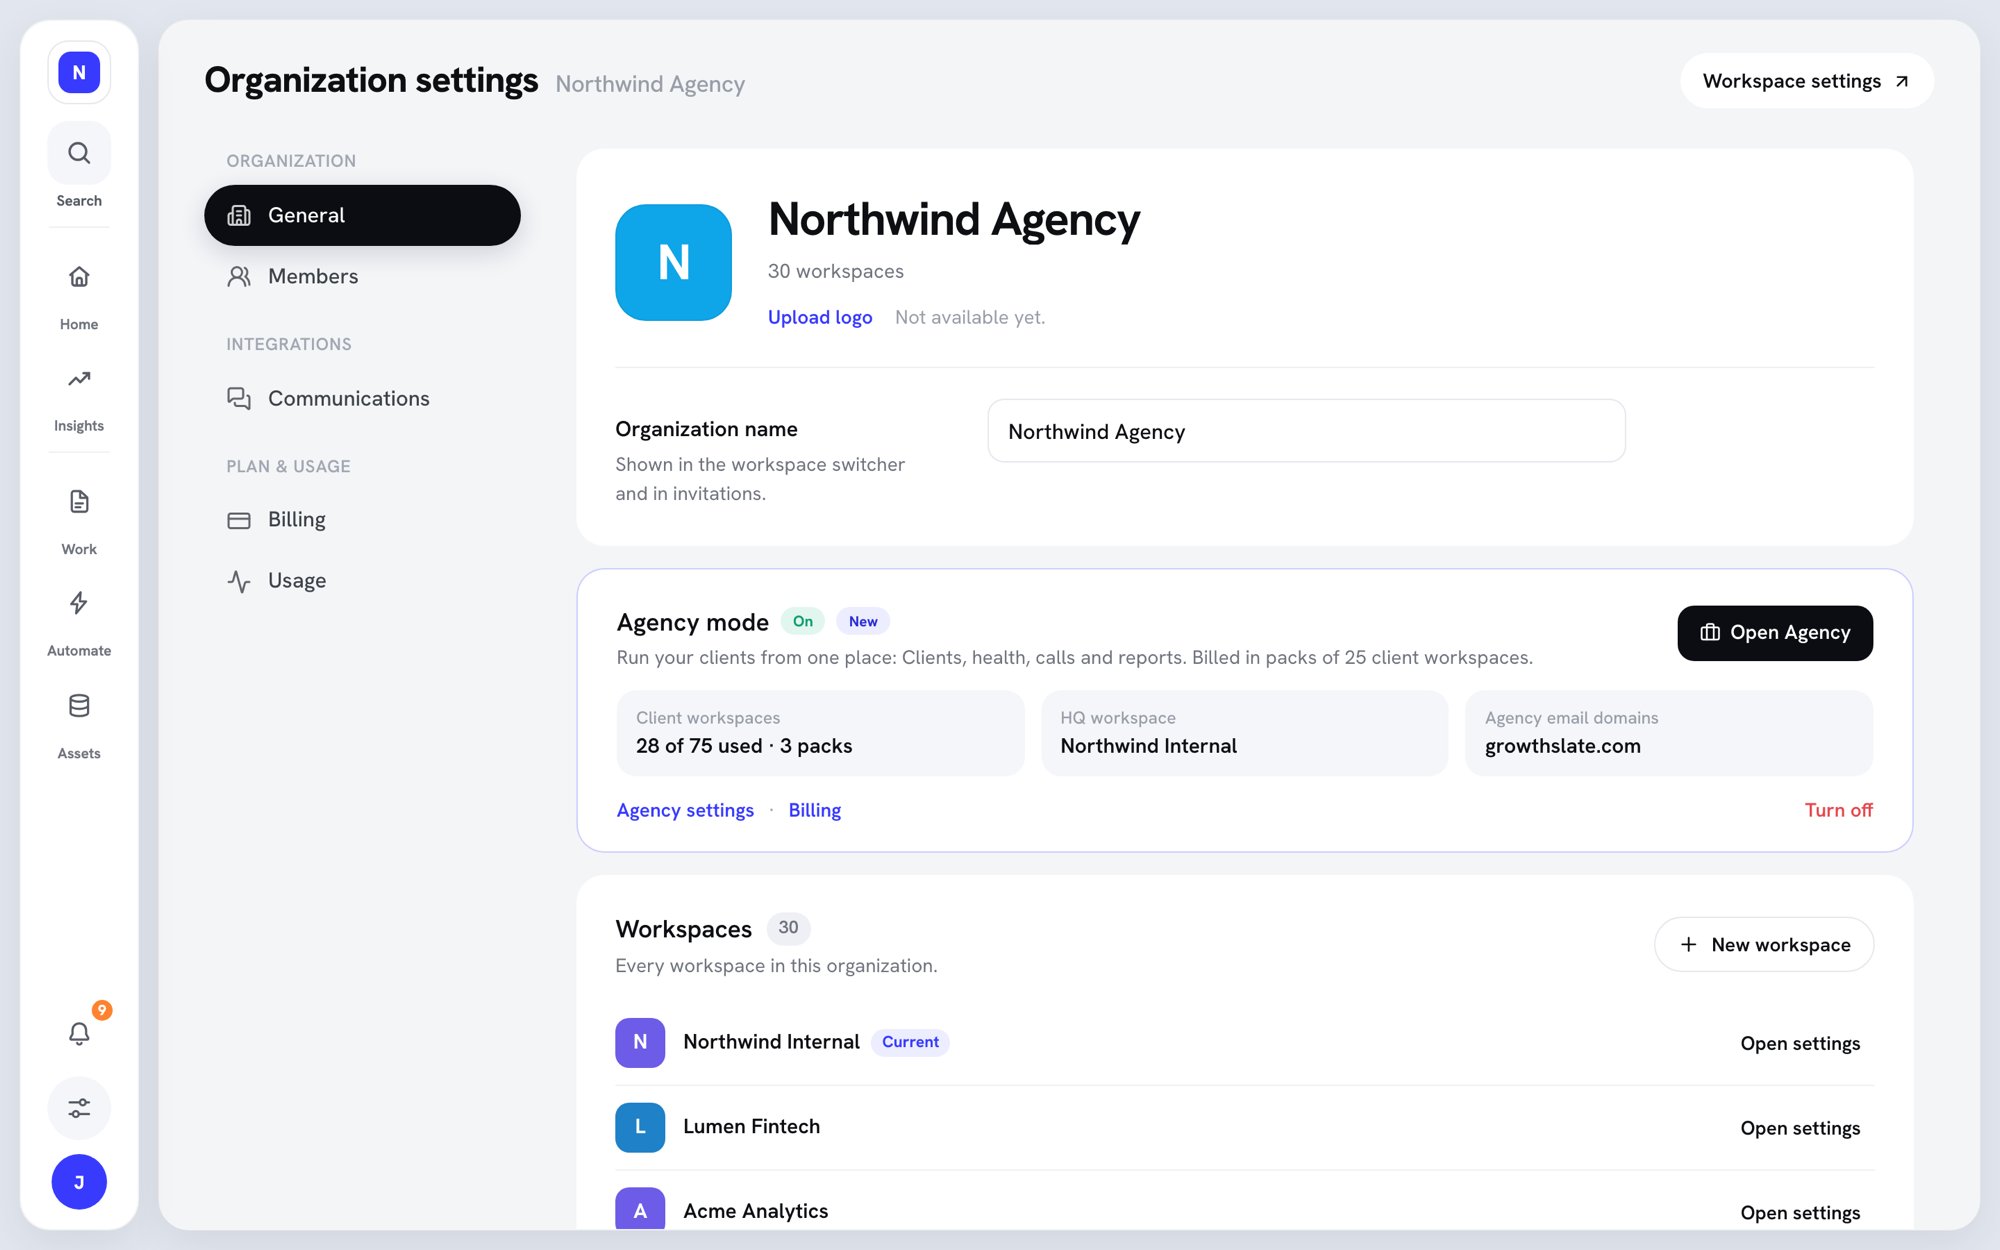
The Agency mode card when Agency mode is on
Add or remove packs
Owners and admins can change packs in Billing:- Open Organization settings → Billing.
- On the Client workspaces meter, click Manage.
- Under Agency mode, use the plus and minus buttons to change the number of packs.
- Confirm the change in the order summary.
Turn off Agency mode
Only the Owner can turn off Agency mode.- On the Agency mode card, click Turn off.
- Read the dialog, then click Turn off on ‹date›.